
If you’re dealing with damp or moldy basement walls, waterproofing is essential. Start by evaluating the condition of your walls to identify cracks and moisture sources. With the right materials and tools, you can effectively prepare and protect your basement. But knowing where to begin and what steps to follow can be overwhelming. Let’s break it down into manageable steps, ensuring your basement stays dry and secure for years to come.
Key Takeaways
- Assess the current condition of walls by checking for cracks, moisture sources, and signs of mold before starting any waterproofing work.
- Gather essential materials and tools like waterproofing compounds, sealants, brushes, and safety equipment to prepare for the project.
- Clean and repair wall surfaces by removing mold, debris, and filling cracks with hydraulic cement to ensure a smooth application of sealants.
- Apply waterproofing sealants evenly, starting from the bottom and ensuring coverage on seams and corners, allowing for proper curing between coats.
- Document the entire process and monitor humidity levels regularly to maintain a dry environment in the basement after waterproofing.
Assessing the Current Condition of Your Basement Walls
Before you can waterproof your basement walls, it’s essential to assess their current condition.
Start by examining for any visible wall cracks, as these can be major entry points for water. Check for moisture sources, like leaking pipes or excessive humidity, which could contribute to dampness.
Use a moisture meter to measure humidity levels in the air and walls. Pay attention to any signs of mold or mildew, as these indicate ongoing moisture problems.
Document your findings to determine the best waterproofing strategy. Identifying issues now will save you time and money later when addressing potential water damage.
Gathering the Necessary Materials and Tools

Before you start waterproofing your basement walls, it’s vital to gather all the essential materials and tools you’ll need.
Make sure you have waterproofing compounds, sealants, and drainage materials on hand, along with tools like brushes, trowels, and a wet vacuum.
Don’t forget to include safety equipment, such as gloves and goggles, to protect yourself during the process.
Essential Waterproofing Materials
As you prepare to waterproof your basement walls, gathering the right materials and tools is essential for achieving a successful outcome.
First, you’ll need high-quality waterproofing sealants or paints, which are critical for effective moisture barriers. Look for products specifically designed for basement applications.
Additionally, consider using waterproofing membranes or sheets if you’re employing advanced waterproofing techniques.
Don’t forget to include caulk for sealing gaps and cracks, as well as drainage materials like gravel or sump pumps if necessary.
Having these essential materials on hand will set you up for success in your waterproofing project.
Required Tools Overview
When undertaking a waterproofing project for your basement walls, having the right tools is just as essential as the materials.
Start with a high-quality paintbrush for applying sealants and a roller for larger areas. You’ll need a putty knife for smoothing out moisture barriers and a caulking gun for precision application. A utility knife helps in cutting materials to fit snugly.
Don’t forget a wet/dry vacuum to clear any debris or excess water. Finally, a measuring tape guarantees accuracy for your waterproofing techniques.
With these tools in hand, you’re well-equipped to tackle your basement waterproofing challenge effectively.
Safety Equipment Checklist
To guarantee your safety while waterproofing basement walls, it’s crucial to gather the right safety equipment before diving into the project.
Start with sturdy safety gear, including gloves to protect your hands from chemicals and sharp edges. A dust mask or respirator is essential to shield your lungs from harmful particles.
Don’t forget safety goggles to guard your eyes against splashes and debris. If you’ll be working in tight spaces, a hard hat can provide added protection.
Finally, keep a first aid kit nearby for any minor injuries.
Prioritize personal protection to guarantee a smooth, safe waterproofing experience.
Preparing the Basement for Waterproofing
Before diving into the waterproofing process, you need to verify your basement is ready for the task ahead.
Start by evaluating basement humidity levels; use a hygrometer to check if they’re excessive. If so, consider a dehumidifier to reduce moisture.
Next, inspect your wall insulation; ascertain it’s in good condition and not absorbing moisture.
Inspect your wall insulation to ensure it’s in good condition and free from moisture absorption.
Remove any obstacles, like furniture or boxes, that may hinder your access to the walls.
Finally, check for any visible cracks or issues that could affect the waterproofing process.
Taking these steps will set a solid foundation for effective waterproofing of your basement walls.
Cleaning and Repairing Wall Surfaces
As you prepare to waterproof your basement walls, cleaning and repairing their surfaces is essential for ensuring a successful application of waterproofing materials.
Start by addressing any mold or mildew, as this helps with mold prevention and humidity control.
Here’s what you should do:
- Remove any loose paint or debris.
- Scrub walls with a mixture of water and vinegar.
- Fill in cracks and holes with hydraulic cement.
- Dry the surfaces thoroughly to prevent moisture buildup.
- Inspect for signs of water damage or leaks.
Taking these steps will create a solid foundation for effective waterproofing and long-lasting protection.
Applying Waterproofing Sealants and Coatings
Once you’ve cleaned and repaired your basement walls, applying waterproofing sealants and coatings becomes essential in preventing moisture intrusion.
Start by selecting the right waterproofing techniques, like liquid rubber or epoxy-based sealants. Before sealant application, verify the surface is dry and free from debris.
Use a brush or roller to apply the sealant evenly, working from the bottom up to avoid drips. Pay extra attention to seams and corners, as these areas are prone to leaks.
Allow the first coat to cure before applying a second coat for maximum protection. This proactive approach keeps your basement dry and safe.
Installing a Drainage System if Necessary
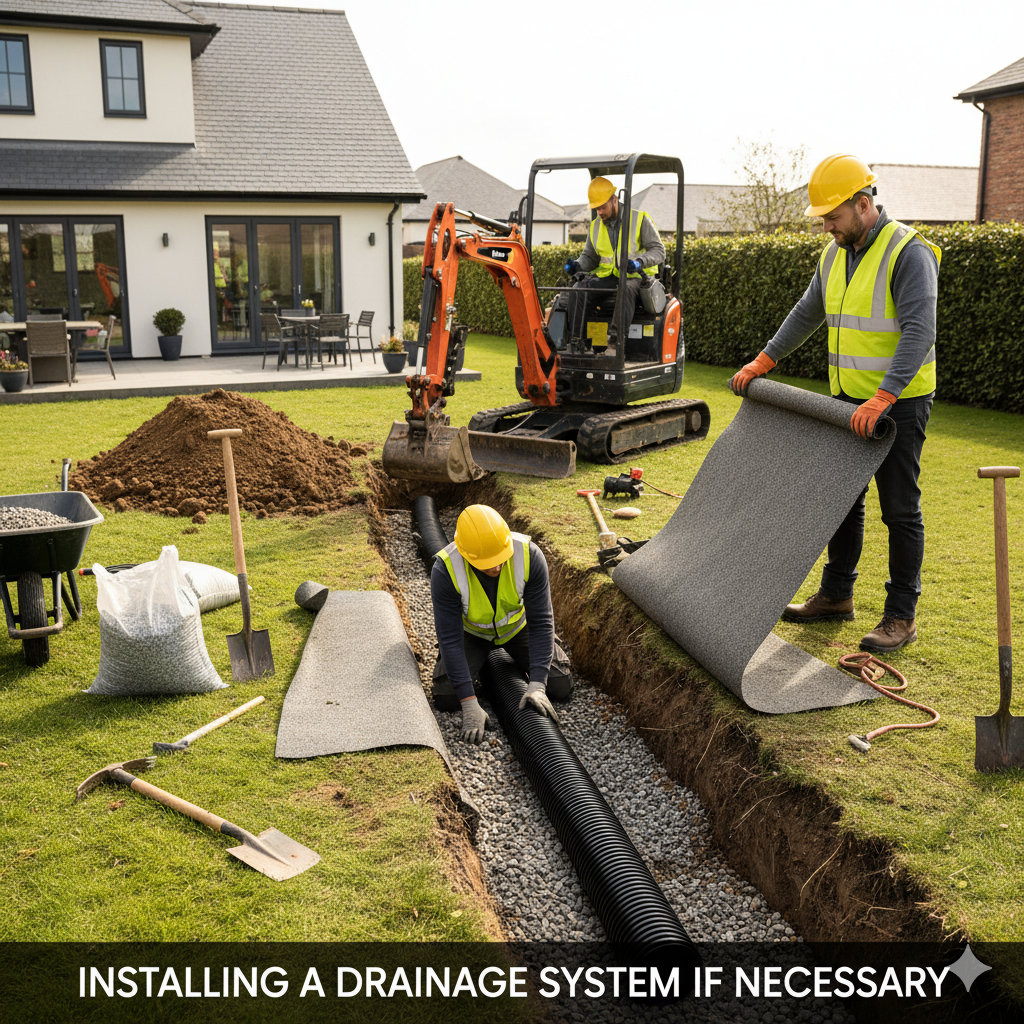
If you notice persistent water issues in your basement, evaluating the situation is essential before installing a drainage system.
You’ll need to determine the source of the water and analyze the best drainage solutions that fit your needs.
Choosing the right system can prevent future water damage and keep your basement dry.
Assessing Water Issues
How do you know if your basement might be suffering from water issues? Start by observing signs of moisture detection, which can indicate various water sources affecting your space.
Look for these common indicators:
- Damp or musty odors
- Water stains on walls or ceilings
- Peeling paint or wallpaper
- Mold growth on surfaces
- Puddles or wet spots on the floor
If you notice any of these issues, it’s essential to assess the situation further.
Ignoring these signs can lead to severe damage and costly repairs. Taking action now can help prevent future problems and protect your home’s integrity.
Choosing Drainage Solutions
When considering ways to keep your basement dry, evaluating drainage solutions is essential.
Start by identifying the appropriate drainage types for your situation, such as interior or exterior systems. Interior drainage involves installing a sump pump and a perimeter drain to collect excess water.
In contrast, exterior systems like French drains and grading redirect water away from your foundation. Use proper installation techniques, guaranteeing pipes slope towards the sump pit and are free from obstructions.
Don’t forget to check local regulations, and if unsure, consult a professional to guarantee effective and compliant drainage solutions for your basement.
Maintaining Your Waterproofed Basement Walls
Maintaining your waterproofed basement walls is essential for guaranteeing long-lasting protection against moisture and potential damage.
Regular wall maintenance can help uphold effective moisture control. Here are some practical steps you should follow:
- Inspect walls for cracks or damage regularly
- Guarantee proper drainage systems remain clear
- Monitor humidity levels with a hygrometer
- Seal any new cracks promptly with appropriate materials
- Keep gutters and downspouts directed away from the foundation
Conclusion
By following these steps, you can effectively waterproof your basement walls and protect your home from moisture damage. Regular maintenance is key, so keep an eye on your walls for any signs of wear or new cracks. If you notice any issues, address them promptly to maintain a dry and safe environment. With the right preparation and materials, your basement can remain a functional space, free from the worries of dampness and mold.