

If you’ve noticed dampness or water stains on your basement walls, it’s time to take action. DIY waterproofing can protect your home from further damage and mold growth. In just seven simple steps, you can effectively tackle the moisture issue. Start by evaluating the problem and clearing the area. But before you plunge into repairs, let’s explore the essential steps you’ll need to take for a successful waterproofing project.
Key Takeaways
- Assess for moisture issues by checking for stains, mold, and measuring humidity levels with a hygrometer.
- Clear the area of furniture and obstacles to ensure easy access to walls for proper waterproofing.
- Repair any visible cracks and holes by cleaning, widening them, and applying high-quality sealant for effective filling.
- Apply a waterproofing sealant using a brush or roller for even coverage, ensuring multiple coats are dried between applications.
- Conduct regular inspections to identify new leaks, mold growth, or signs of dampness around walls and plumbing fixtures.
Assess the Moisture Problem
How can you effectively identify the moisture issues in your basement? Start by checking for visible signs like water stains, mold, or peeling paint.
Next, monitor humidity levels using a hygrometer; ideal levels are between 30-50%. High humidity can indicate moisture sources like leaks or poor ventilation.
Inspect pipes, windows, and the foundation for any cracks or gaps where water might enter.
Pay attention to seasonal changes, as heavy rains can exacerbate these issues.
Clear the Area
After identifying the moisture sources in your basement, the next step is to clear the area.
Start by organizing tools and materials you’ll need for the waterproofing process. Gather items like sealants, brushes, and a trowel in a designated spot.
Organize your waterproofing tools and materials, including sealants, brushes, and a trowel, for an efficient project.
Next, remove obstacles such as boxes, furniture, or anything else that may hinder your access to the walls. This will allow you to work efficiently and guarantee you don’t miss any spots while applying your waterproofing solutions.
With a clear workspace, you’re set for the next steps in your waterproofing project, leading to a drier, safer basement.
Repair Cracks and Holes
Before applying any waterproofing solutions, it’s essential to repair cracks and holes in your basement walls to confirm a solid foundation for your efforts.
Start by inspecting the walls for any visible damage. Use a chisel to widen cracks slightly, allowing for better crack filling. Clean out debris and dust to guarantee proper adhesion.
Next, apply a high-quality sealant tailored for basement use into the cracks and holes, ensuring it fills completely. Smooth the surface with a putty knife for an even finish.
Allow the sealant to cure fully before moving on to the next step in your waterproofing project.
Apply a Waterproofing Sealant
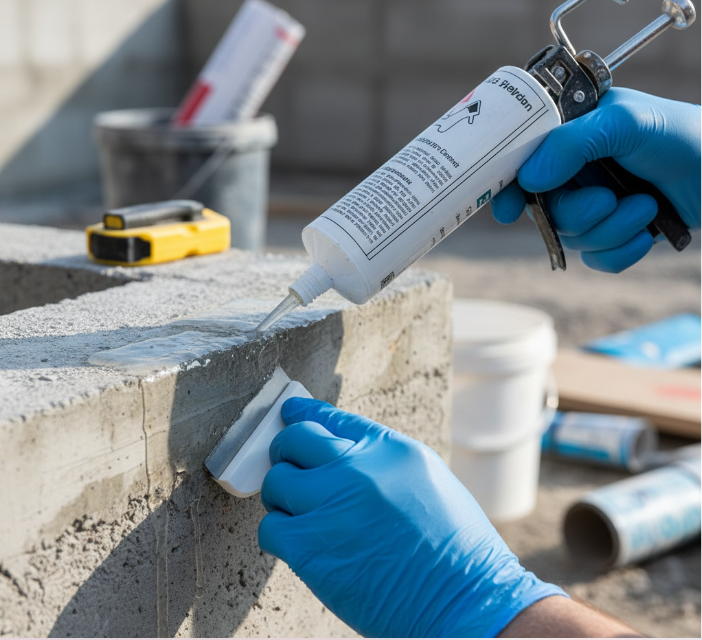
Now that you’ve repaired any cracks and holes, it’s time to apply a waterproofing sealant to your basement walls.
Choose from various sealant types, such as liquid, paint-on, or roll-on options. Be certain to follow proper application techniques for the best results.
- Clean the walls thoroughly before application.
- Use a brush or roller for even coverage.
- Apply multiple coats as needed, allowing drying time in between.
- Check for any missed spots after the first coat.
- Maintain proper ventilation during the application process.
Following these steps will help guarantee your basement stays dry and protected.
Install a Drainage System
Having applied a waterproofing sealant to your basement walls, it’s important to address the water that may still accumulate around your foundation.
Installing a drainage system is a practical solution. Start by exploring drainage options like French drains or perforated pipes to redirect water away from your basement.
If you expect significant water accumulation, consider adding a sump pump to remove excess water efficiently. Position the sump pump in the lowest part of your basement, ensuring it connects to a discharge line that directs water outside.
This installation will help keep your basement dry and protect your waterproofing efforts.
Use a Dehumidifier

A dehumidifier is a valuable tool for maintaining a dry basement environment after you’ve waterproofed your walls. It helps with moisture control by removing excess humidity, preventing mold and mildew growth.
Here are some key dehumidifier benefits:
- Reduces dampness and musty odors
- Protects stored items from moisture damage
- Encourages a healthier living space
- Lowers risk of structural damage
- Improves air quality
Using a dehumidifier consistently guarantees your basement stays dry and comfortable.
Maintain Regular Inspections
To keep your basement waterproofed, it’s essential to maintain regular inspections.
Look for any signs of water leaks and check for mold growth, as both can lead to serious issues if left unchecked.
Inspect for Water Leaks
While it might seem like a minor detail, regularly inspecting your basement walls for water leaks is essential in preventing larger issues down the line.
Effective leak detection helps you identify potential water sources before they cause damage. Make it a habit to check your basement periodically.
Here are five tips to guide your inspections:
- Look for visible water stains or discoloration.
- Check for dampness or moldy odors.
- Inspect around windows and doors for gaps.
- Examine pipes and plumbing fixtures for leaks.
- Monitor the floor for pooling water.
Staying proactive can save you time, effort, and money in the long run!
Check for Mold Growth
How often do you check for mold growth in your basement?
Regular inspections are essential for mold prevention and moisture control. Make it a habit to inspect your basement at least once a month.
Look for any dark spots or unusual odors, as these can indicate mold presence. Pay special attention to corners, behind appliances, and areas near water sources.
If you find mold, act quickly to remove it and address any moisture issues.
Remember, controlling humidity levels and ensuring proper ventilation can greatly reduce mold risks.
Stay proactive, and your basement will remain a safe, dry space.
Conclusion
By following these seven simple steps, you can effectively waterproof your basement walls and protect your home from moisture damage. Start by evaluating the problem, clearing the area, and repairing any cracks. Then, apply a high-quality sealant and consider installing a drainage system if needed. Don’t forget to use a dehumidifier to control humidity levels. Regular inspections will help you catch any issues early, ensuring your basement stays dry and safe for years to come.


