When it comes to waterproofing your basement, mastering the injection method is vital for effective results. You’ll need to prepare the area meticulously, select the right materials, and apply them correctly to guarantee a strong seal against water intrusion. Each step plays a key role in preserving your basement’s integrity. Understanding the nuances of crack identification and material application can greatly impact your success. Let’s explore the process in detail to make sure your efforts yield lasting results.
Key Takeaways
- Assess the type and severity of cracks to select the appropriate waterproofing method, such as epoxy for small cracks or polyurethane for larger ones.
- Prepare the area by ensuring proper drainage, clearing debris, and inspecting for existing moisture issues before beginning the injection process.
- Gather essential tools like an injection gun, drill, and safety gear to ensure a safe and efficient waterproofing operation.
- Carefully mix the waterproofing compound according to manufacturer instructions, using a drill mixer for consistency to ensure effective application.
- Apply the compound swiftly with a trowel or spray applicator, monitoring the setting time for best results in sealing the cracks.
Understanding Basement Injection Waterproofing
When you’re facing water intrusion issues in your basement, understanding basement injection waterproofing becomes vital to safeguarding your home.
This method targets basement moisture by injecting a specialized waterproofing material directly into the wall cracks or joints. It creates a barrier that prevents water from seeping through.
Various waterproofing methods exist, such as polyurethane and epoxy injections, each suited to different types of cracks and moisture conditions. Selecting the right method is essential for effectiveness.
Proper application guarantees long-lasting protection against future water damage, preserving your home’s structural integrity and providing peace of mind in wet weather conditions.
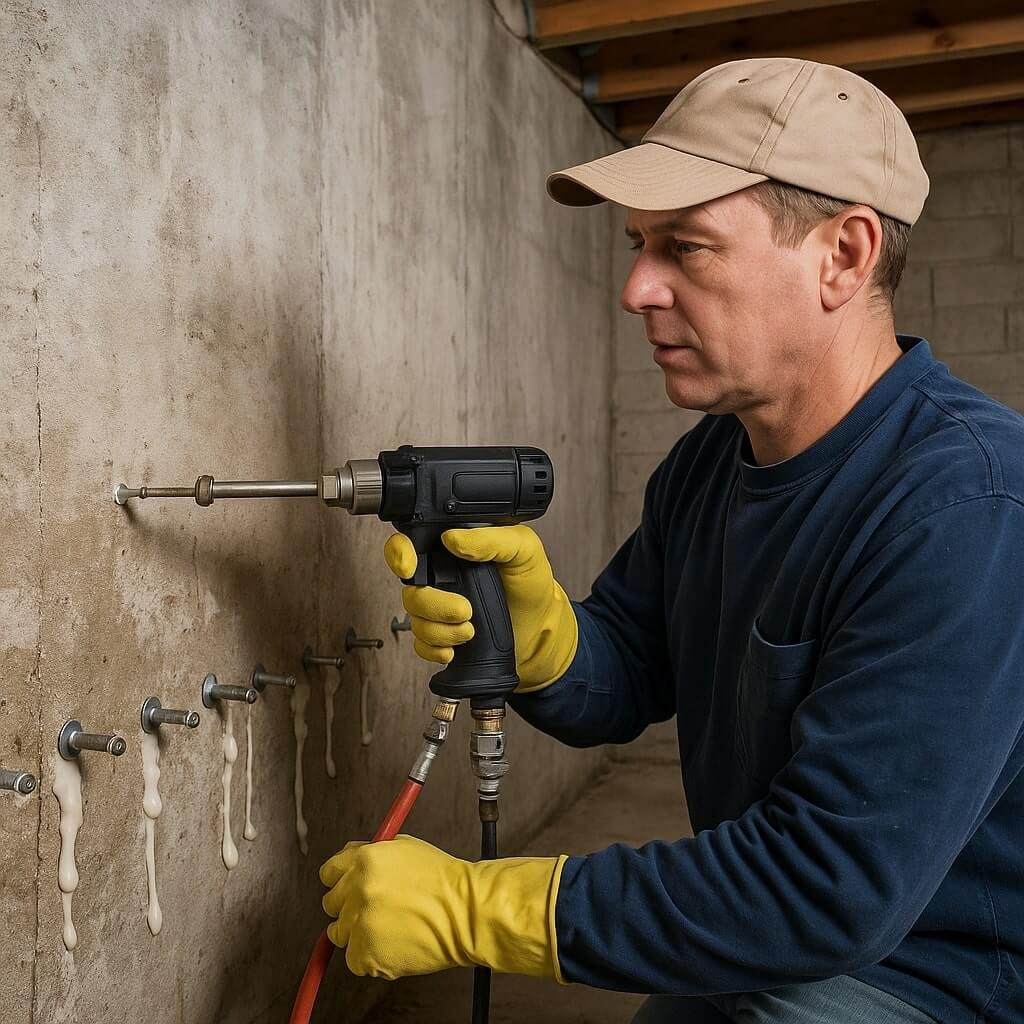
Tools and Materials Needed
To effectively execute basement injection waterproofing, you’ll need a precise set of tools and materials.
Start by gathering essential tools, followed by a detailed checklist of waterproofing materials to guarantee ideal results.
Don’t forget to equip yourself with the necessary safety gear to protect against potential hazards during the process.
Essential Tools Overview
Successful basement injection waterproofing relies heavily on having the right tools and materials at your disposal.
To effectively tackle the job, you’ll need essential tools that guarantee precision and efficiency. Equip yourself with the following waterproofing equipment:
- Injection Gun: A high-quality gun allows for controlled application of the waterproofing material.
- Drill with Masonry Bit: This tool helps create precise holes in the wall for injection.
- Pressure Gauge: It assures you’re applying the right amount of pressure during the injection process.
With these essential tools, you’ll be well-prepared to execute a successful basement waterproofing project.
Waterproofing Materials Checklist
Before starting your basement injection waterproofing project, it’s crucial to gather all necessary materials that will guarantee a successful outcome. Understanding different waterproofing types and their material properties is essential. Here’s a checklist to streamline your preparation:
| Material | Purpose | Properties |
|---|---|---|
| Epoxy Resin | Seal cracks | Strong adhesion, flexible |
| Hydraulic Cement | Fill gaps | Fast-setting, durable |
| Waterproof Membrane | Barrier protection | Water-resistant, breathable |
Having these materials on hand will help assure your waterproofing efforts are effective and long-lasting.
Safety Gear Requirements
When tackling basement injection waterproofing, ensuring your safety is paramount. Adhering to safety precautions is essential to protect yourself from chemical exposure and physical hazards.
Equip yourself with the right protective equipment to minimize risks during the process. Here’s what you need:
- Nitrile gloves: For protection against harmful chemicals.
- Safety goggles: To shield your eyes from splashes and debris.
- Respirator mask: To filter out harmful vapors and maintain air quality.
Investing in these items will help you execute your project effectively while prioritizing your well-being.
Always remember, safety first means a successful waterproofing job!
Preparing the Area for Injection
To guarantee effective waterproofing during basement injection, you must first thoroughly assess and prepare the area where the injection will take place.
Begin by ensuring proper drainage around the foundation; this prevents water accumulation that can hinder the injection process. Clear away any debris, dirt, or obstructions to allow easy access to the injection points.
Next, inspect for existing moisture problems; addressing these will enhance moisture control during and after injection. Establish a clean working environment, as contaminants can interfere with the sealant’s performance.
Proper preparation sets the foundation for a successful, long-lasting waterproofing solution.
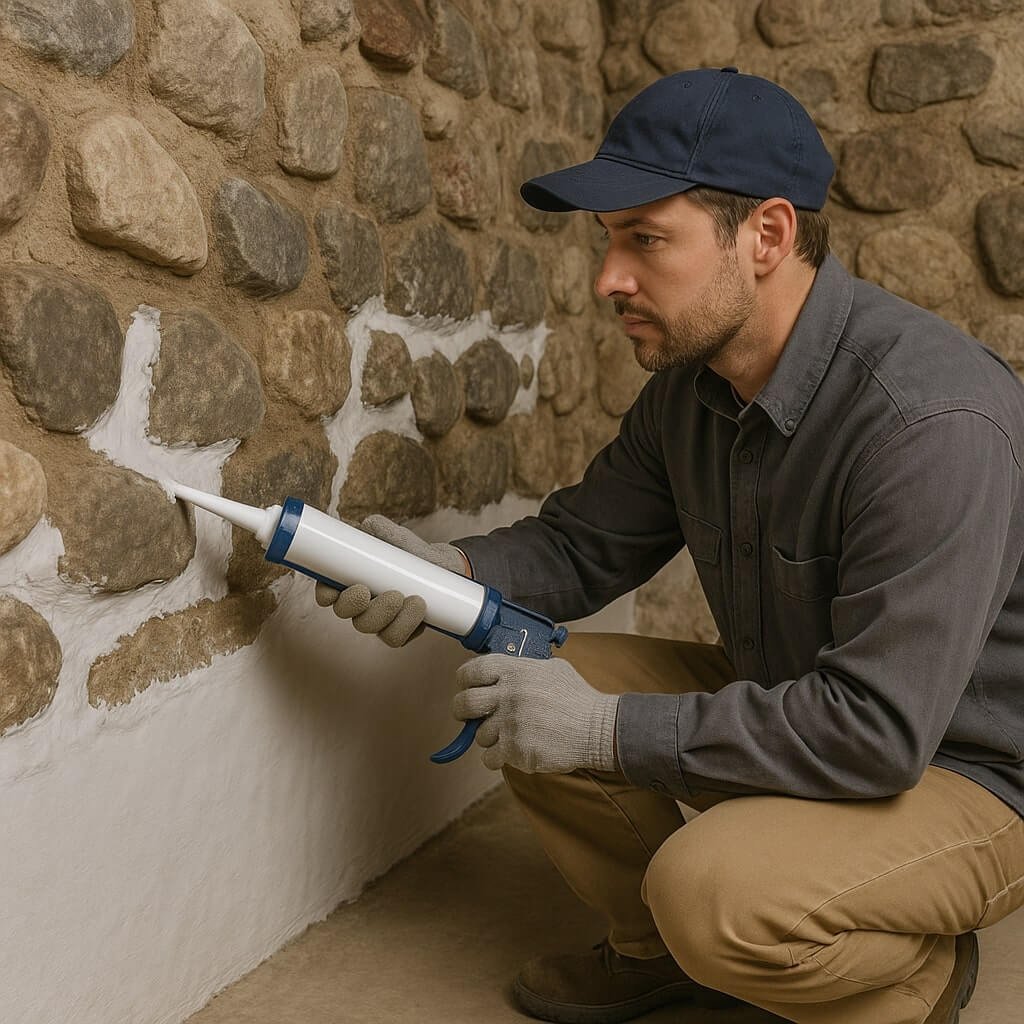
Identifying and Sealing Cracks
To effectively waterproof your basement, you need to identify the types of cracks present in the walls and floor.
Each crack type, whether horizontal, vertical, or stair-step, requires specific sealing techniques to guarantee a watertight barrier.
Understanding these distinctions will help you select the right materials and methods for a successful repair.
Types of Cracks
Identifying and sealing cracks in your basement is essential for effective waterproofing, as various types can indicate underlying issues.
Understanding the crack types can help you assess your basement’s structural integrity.
- Hairline Cracks: Often non-structural, they may signal surface shrinkage.
- Vertical Cracks: Typically indicate settling, requiring careful monitoring.
- Horizontal Cracks: More serious, these can suggest pressure from soil expansion.
Sealing Techniques
While sealing cracks in your basement is essential for preventing water intrusion, choosing the right technique depends on the type and severity of the crack.
For small hairline cracks, epoxy injections are effective sealing methods, filling voids and creating a waterproof barrier.
For larger cracks, consider using polyurethane foam, which expands and seals the space while allowing for some movement.
Ascertain proper surface preparation by cleaning and drying the area before application.
Always evaluate your waterproofing strategies to address underlying issues, like drainage problems, to achieve long-term success in keeping your basement dry and secure.
Mixing and Applying the Waterproofing Compound
Start by carefully measuring the components of your waterproofing compound to ascertain a consistent mix.
Utilize proper mixing techniques, like using a drill mixer for thorough integration. Once mixed, apply the compound using effective application methods to guarantee even coverage.
- Use a trowel or brush for precision on small areas.
- For larger sections, consider a spray applicator to achieve a uniform coat.
Work quickly, as the compound may set rapidly.
Always follow the manufacturer’s guidelines for proportions and mixing times to optimize performance. This will help ascertain your waterproofing efforts yield long-lasting results.
Testing for Effectiveness
After applying the waterproofing compound, it is crucial to test its effectiveness to guarantee that your efforts achieve the desired results. Conduct an effectiveness assessment by monitoring specific performance metrics over time. Consider the following table to identify key aspects to evaluate:
| Performance Metric | Evaluation Method |
|---|---|
| Water penetration | Visual inspection |
| Moisture levels | Hygrometer readings |
| Surface integrity | Tap test |
| Temperature variations | Infrared thermometer checks |
| Odor presence | Sensory evaluation |
Maintaining Your Waterproofed Basement
To guarantee the longevity and effectiveness of your waterproofed basement, regular maintenance is essential.
Monitor and manage basement humidity levels to prevent mold growth.
Here are some key maintenance tasks:
- Inspect the foundation walls for cracks or wear regularly.
- Check gutters and downspouts to confirm they direct water away from the foundation.
- Utilize a dehumidifier to keep humidity levels low, promoting mold prevention.
Conclusion
By mastering basement injection waterproofing, you verify a durable barrier against water intrusion. Following the outlined steps—preparing the area, identifying cracks, and applying the right materials—guarantees a secure seal. Remember, testing the effectiveness of your work is essential for long-term success. Regular maintenance will further protect your basement, preserving its structural integrity for years. With these techniques, you’re well-equipped to tackle any waterproofing challenges that arise.